
Before you use this guide
Heavy boss and final-boss spoilers follow. PowerPyx records 18 fight entries in the Practice Ground’s Boss Rematch menu. That list includes enhanced variants and paired encounters, so it is not a claim that the story contains 18 unique bosses. The order below follows the rematch menu, not the story.
The linked strategy guide and its videos were made on Carnage difficulty. Use the notes as attack-reading cues rather than fixed promises about damage, timing or the number of hits you can survive.
If Parry, Deflect and Issen still feel interchangeable, start with the defensive controls guide. For a first clear, the safest preparation is usually a fully improved default Hozuki Pouch plus charms that support healing, protection and your regular attacks. Carnage unlocks after completing the game once.
All 18 Boss Rematch fights
| # | Fight | First thing to learn |
|---|---|---|
| 1 | Byakue | Deflect axe swings; dodge its body charges. |
| 2 | Byakue (Enhanced) | Keep clear of Malice pools and jump the charged ground slam. |
| 3 | Dohatsu-ten | Break its guard when normal attacks stop dealing damage. |
| 4 | Dohatsu-ten (Enhanced) | Expect enhanced attacks earlier in the fight. |
| 5 | Nue (Blue) and Nue (Red) | Keep both targets in view and return tail projectiles. |
| 6 | Sasaki Ganryu | Read the delayed sword rhythm; avoid the kick and blue grab. |
| 7 | Sasaki Ganryu (Altered) | Watch Gioh as well as Ganryu and interrupt her support with the bow. |
| 8 | Daidara | Collect loose souls before he absorbs them; attack the leg armour. |
| 9 | Rasho-gan | Use Oni Vision to reveal the cord, then shoot it. |
| 10 | Greater Nue | Deflect its white tail swipe and keep moving during lightning rain. |
| 11 | Benkei | Break stamina, then choose red targets to remove armour. |
| 12 | Benkei (Fully Armed) | Respect the cannon and shoot its charged weapon attack. |
| 13 | Ifuu | Shoot the inflated wind organ when it becomes exposed. |
| 14 | Burai | Move through the lightning field and stop attacking when the kick tell appears. |
| 15 | Ifuu and Burai | Keep both visible and respond to their shared voice cue. |
| 16 | Shuten Doji | Maintain pressure to limit healing and interrupt fire breath with the bow. |
| 17 | Dokyo | Use Oni Vision to identify the real target and look for safe cover. |
| 18 | Minamoto no Yoshitsune | Save key consumables for the later phases and build Oni Awakening. |
Sasaki Ganryu: answer the sword, avoid the kick
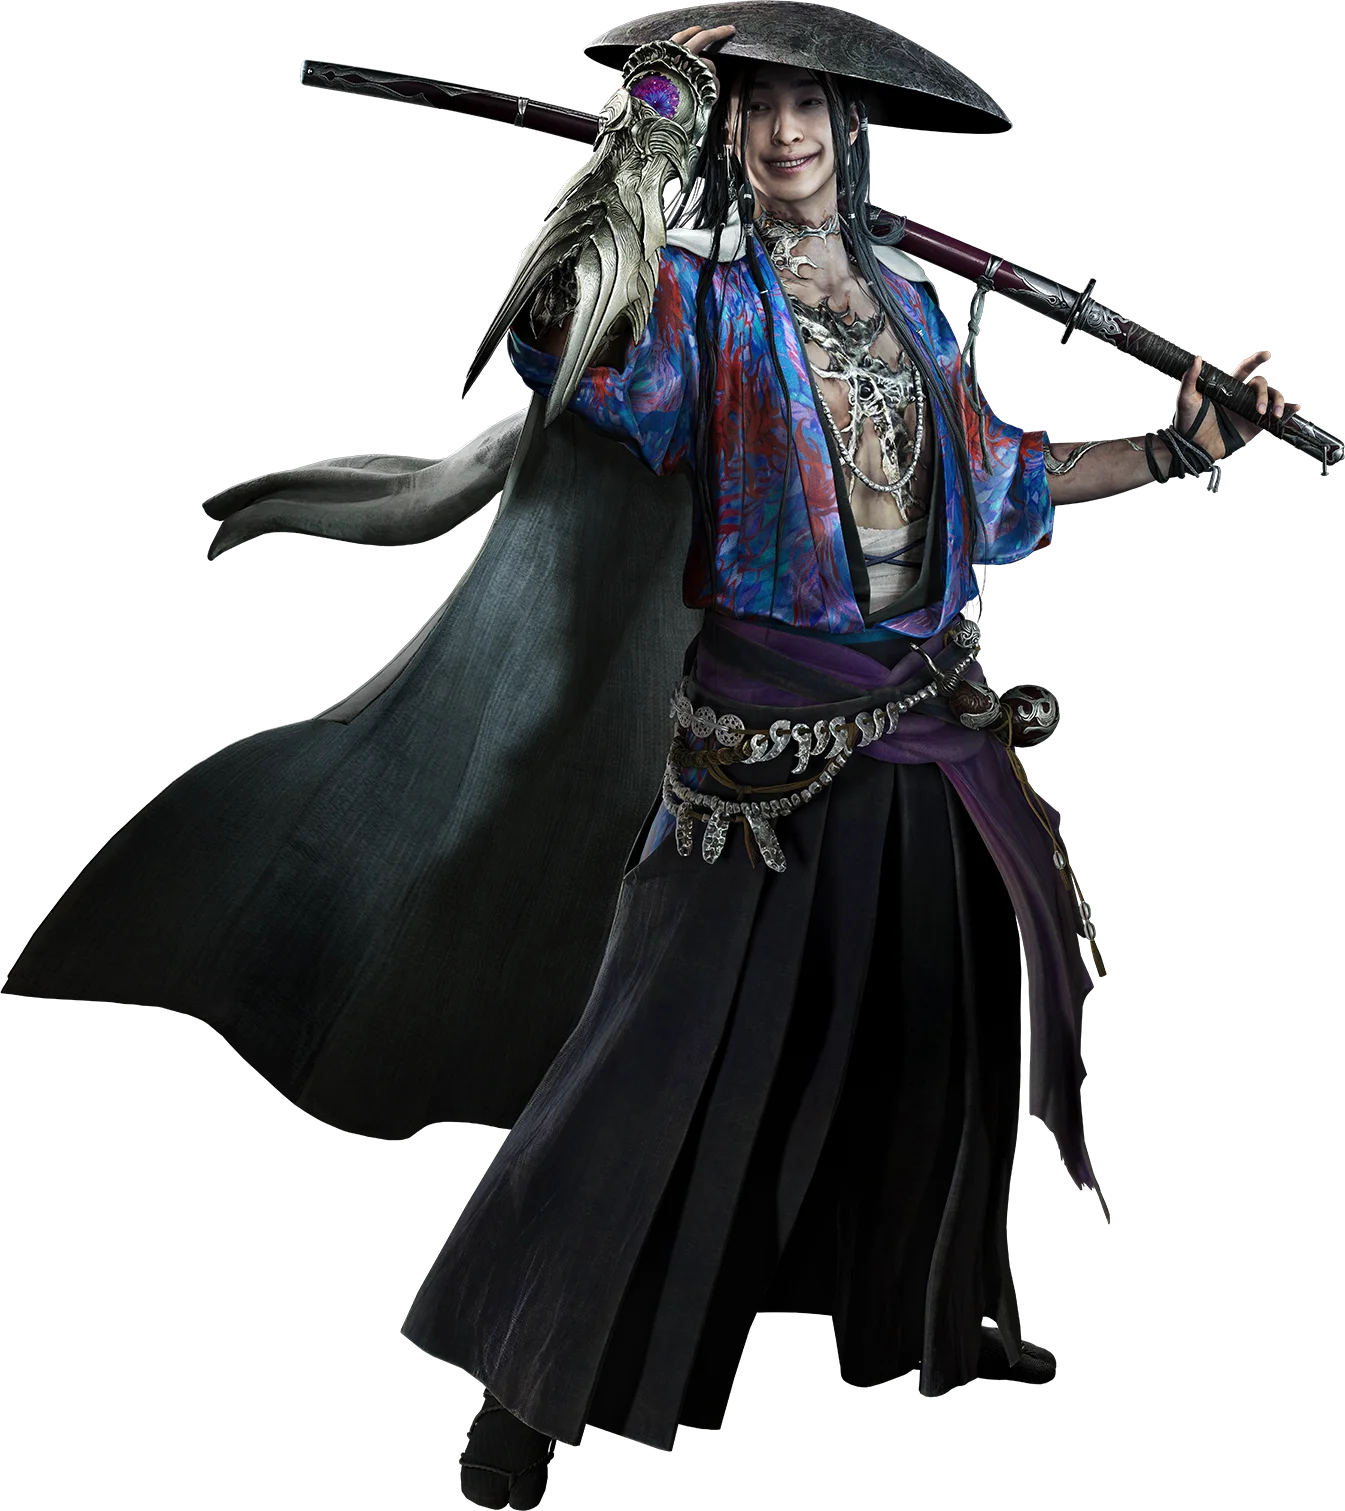
For the early temple duel, PowerPyx’s story-boss notes recommend parrying sword strikes and using short light-attack follow-ups. Maintain pressure so his stamina does not freely recover. When his hat comes off, watch for jumping kicks and evade them.
The altered rematch adds Gioh to the encounter. Keep her tentacles in view while reading Ganryu’s faster sword attacks. When she stretches toward the red flowers to restore his stamina, use the Oni Bow to interrupt her.
Daidara: watch the souls and the legs
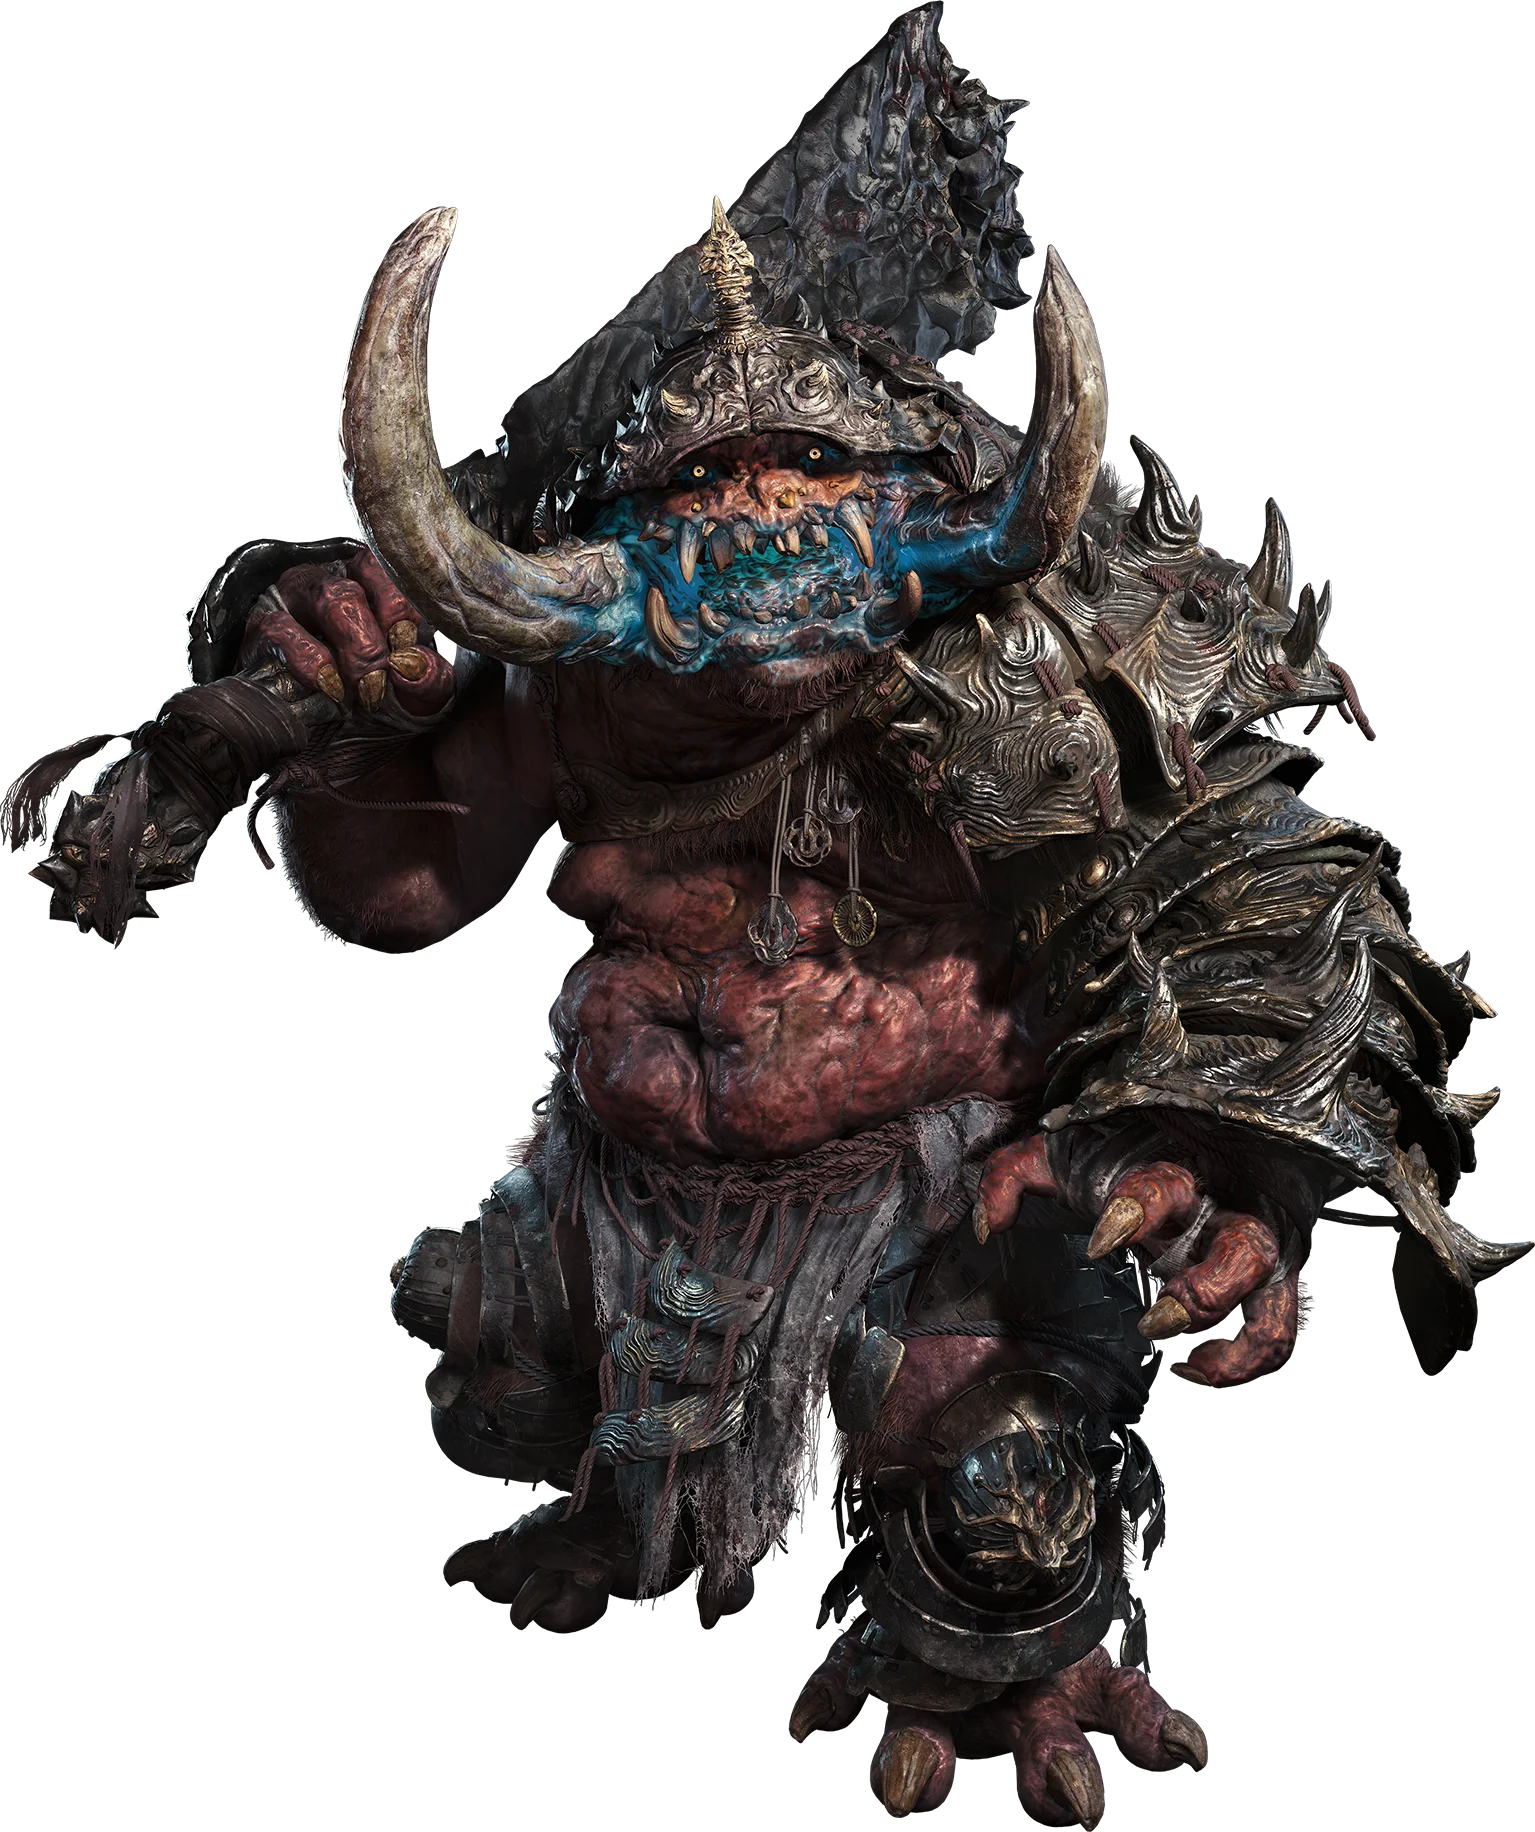
Collect loose souls before Daidara absorbs them and powers up. Dodge the kick and overhead slam, then use the slower weapon swings as Deflect opportunities. When Break Issen presents targets, damaging the leg armour creates better openings for regular attacks.
Byakue and Dohatsu-ten: separate movement from weapon timing
Against Byakue, treat the axe and the body as two different reads: the Carnage guide recommends deflecting axe swings but dodging shoulder and running charges. The enhanced fight adds Malice to the axe slam, so jumping the impact and leaving the affected ground is safer than forcing another counter.
Dohatsu-ten’s regular sword attacks can be Deflected, but its white-glowing attacks demand a Parry or Deflect. If your attacks stop making progress, use the guard-break input instead of continuing a normal combo.
Rasho-gan: inspect the arena before trading blows
Activate Oni Vision at the start to expose the cord tethering Rasho-gan, then shoot it with the Oni Bow. At range, prepare for Malice projectiles; the larger orb can also be shot. Stay close enough to limit the projectile barrage, but leave room to read the grab and the objects thrown during the second phase.
Nue and the brother fights: control the camera
For the two Nue and the Ifuu/Burai pairing, the community guide recommends leaving lock-on off so both attackers remain visible. This is more important than squeezing in one extra hit. Against the brothers, breaking either stamina bar while they stand together can damage both; their shouted cue announces the shared lunge.
In the solo fights, the Oni Bow is central: shoot Ifuu’s inflated organ to stop the suction or airborne attack. Against Burai, sidestep the lightning patterns, and disengage when he raises a leg to prepare a counter-kick.
Benkei: armour is the real first health bar
Regular damage is limited until armour pieces are removed. Deflect the polearm sequence to exhaust stamina, then choose the red armour targets instead of always taking restorative souls. In the fully armed encounter, dodge the thrown cannon and move away from the delayed explosion; when Benkei charges the shoulder-mounted weapon, shoot it with the Oni Bow.
Shuten Doji and Dokyo: interrupt the gimmick
Shuten Doji restores health, so use safe attack windows rather than backing away indefinitely. Shoot him when he prepares fire breath, and shoot the inflated head during the later phase.
Dokyo turns the fight into a chase. Oni Vision reveals the real Dokyo when a duplicate appears. When the arena rocks are destroyed in the later phase, identify the one uncracked rock and get behind it; on Carnage, missing that cover is fatal according to the linked guide.
Minamoto no Yoshitsune: prepare for three phases
The final encounter spans three phases. PowerPyx recommends saving Amulets of Introspection, Stimulants, Sun-Dried Hozuki, stronger talismans and Heavy Restoratives for the later phases rather than spending them early.
Deflecting is the safer foundation in the armoured second phase. Choose purple souls after stamina breaks to build Oni Power and Oni Awakening. In phase three, normal damage only works while Musashi is in Oni Awakening, so the fight becomes a loop of generating blue and purple souls, transforming, landing damage, and saving the Oni finisher until the gauge is nearly empty.
For visual introductions rather than combat advice, visit the rival gallery. If your build is holding you back, use the upgrade route before returning to Boss Rematch.